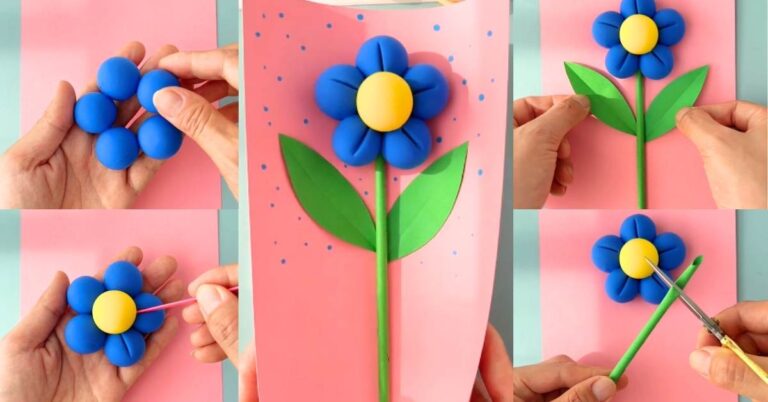
DIY Q-Tip Flower Vase Craft
Looking for a fun and easy craft project for kids?
This DIY Q-Tip Flower Vase is a colorful and creative way to brighten up any space!
Follow the simple steps below to make your own beautiful bouquet.
Materials Needed:
- Paper or plastic cup
- Colored construction paper
- Double-sided tape
- Scissors
- Q-Tips
- Markers or paint (optional for decorating the vase)
Instructions:
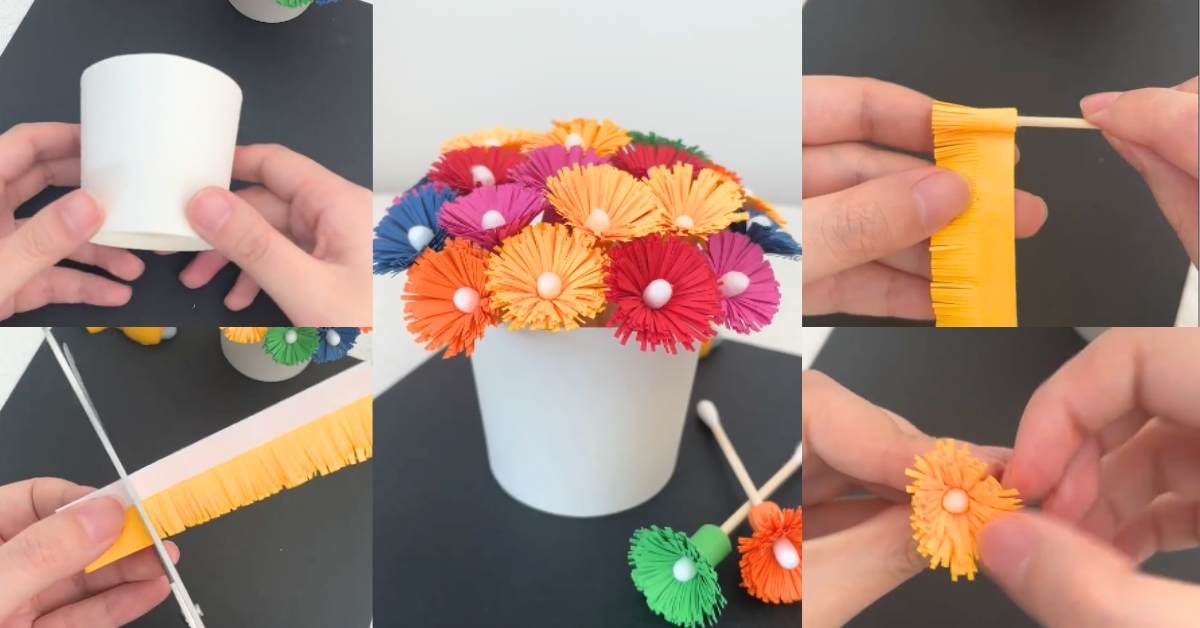
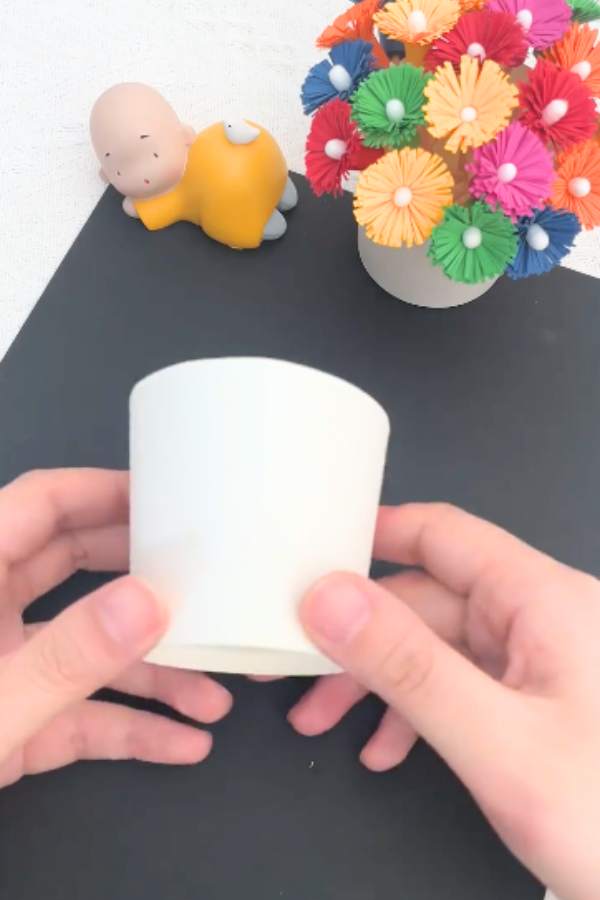
Step 1: Make the Vase
Take a paper or plastic cup and cut off the top about an inch down. The bottom part will serve as your vase.(Optional)
Decorate the vase with markers, stickers, or paint to add a personal touch!
Step 2: Create the Flower Petals
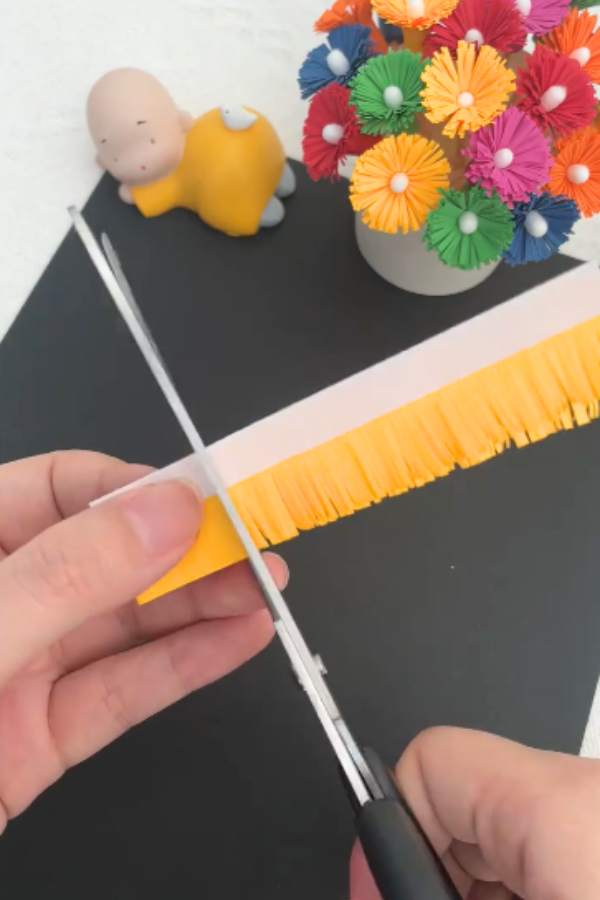
Cut a strip of colored construction paper about 2 inches wide and 12 inches long.
Place a strip of double-sided tape along the bottom edge of the paper strip.
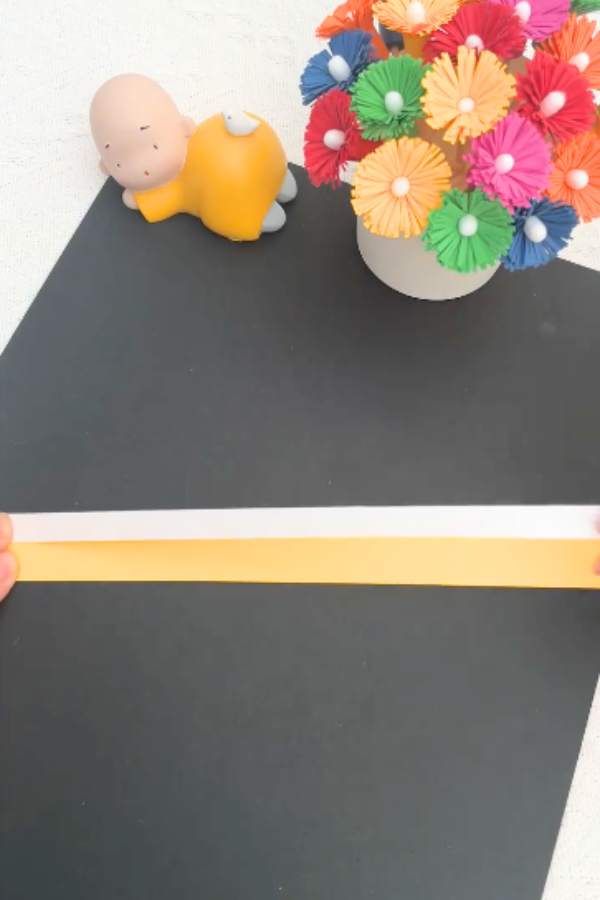
Use scissors to carefully cut small slits along the top edge of the paper, creating a fringe. These will become the flower petals.
Step 3: Assemble the Flowers
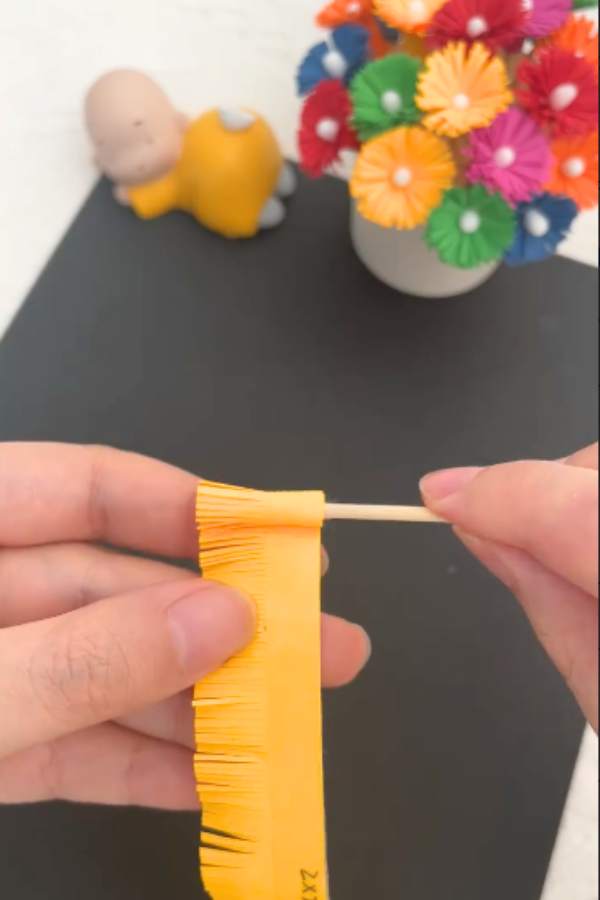
Peel off the backing from the double-sided tape.
Take a Q-Tip and press the tip onto one end of the sticky tape.
Slowly roll the Q-Tip along the tape, wrapping the fringed paper around it.
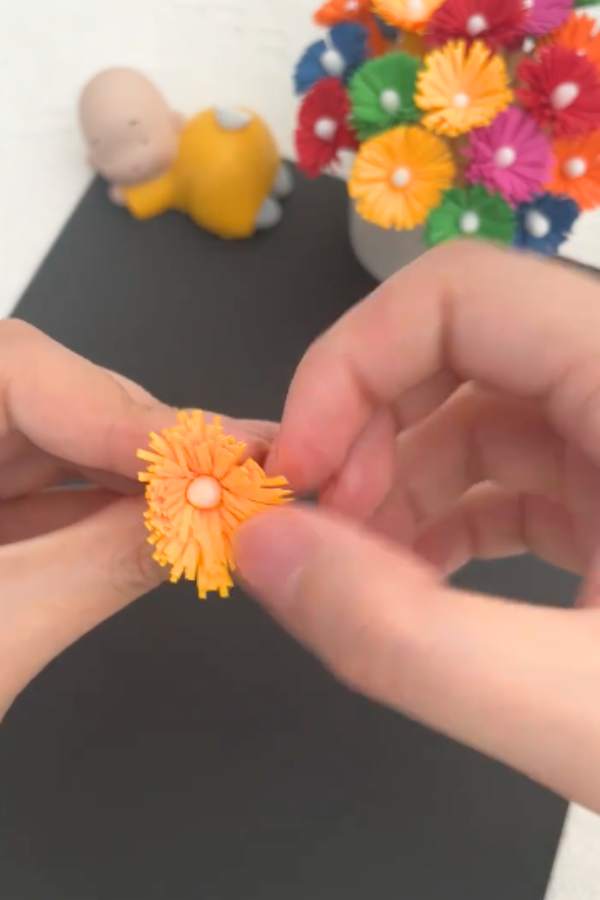
Once fully rolled, gently spread and flatten the cut edges to form the flower petals.
Repeat this process until you’ve made as many flowers as you’d like.
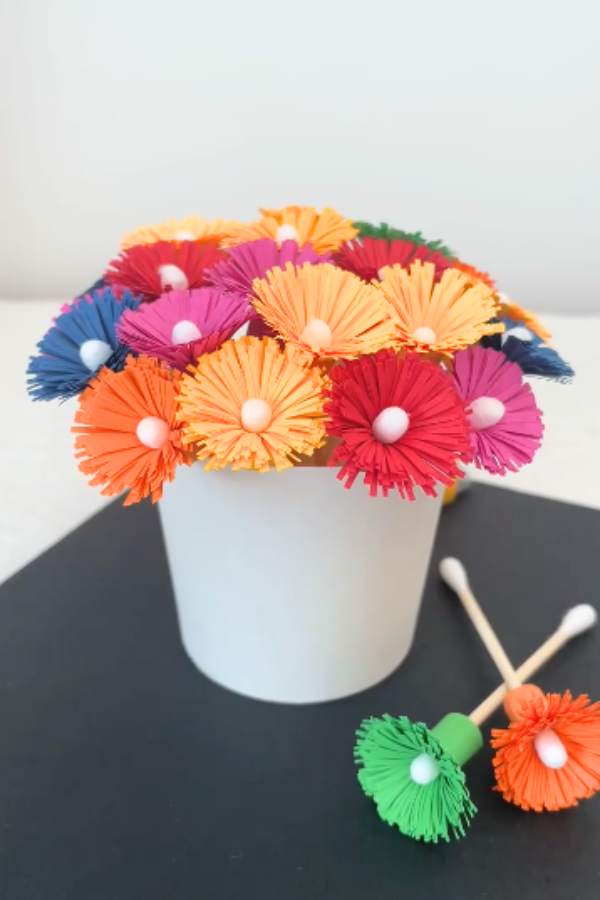
Step 4: Arrange Your Bouquet
- Place your completed Q-Tip flowers into the cup vase.
- Adjust the flowers to make your bouquet look full and vibrant!
Extra Ideas:
- Use different colored paper for a colorful bouquet.
- Paint the tips of the Q-Tips for a more colorful flower center.
- Add leaves by cutting out green paper and gluing them to the Q-Tip stems.
Enjoy your beautiful homemade flower vase!
Happy Crafting!