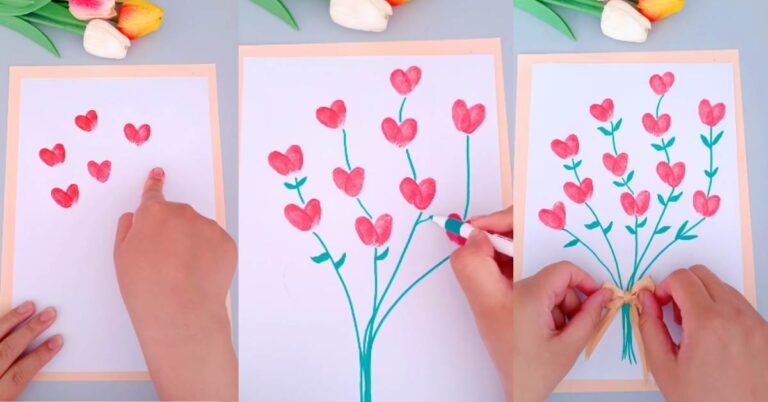
Blooming Play-Doh Flower Craft
Get ready to bring a burst of color and creativity to your day!
This Blooming Play-Doh Flower Craft is the perfect way to let your imagination blossom.
With just a few simple materials and a sprinkle of fun, you can create a vibrant bouquet that never wilts.
Roll, shape, and decorate your own flowers—perfect for brightening up any room or gifting to someone special!
Materials Needed:
- White construction paper
- Green marker
- Red Play-Doh
- Yellow Play-Doh
- Plastic butter knife or Play-Doh tool
- Glue stick or liquid glue
- Red marker
- Tissue paper (white or light-colored)
- Ribbon (any color) for the bow
Instructions:
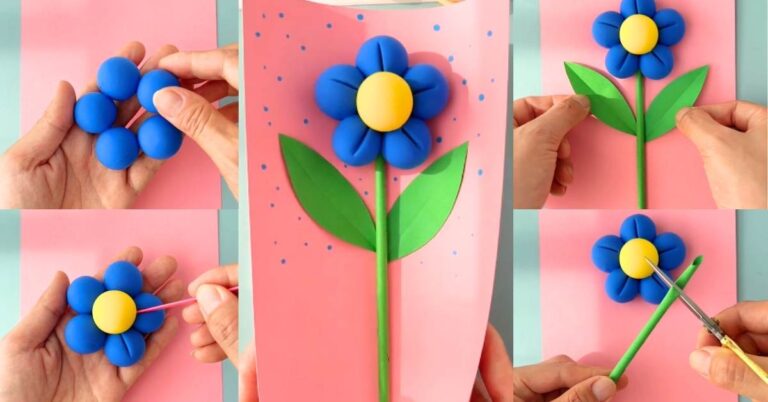
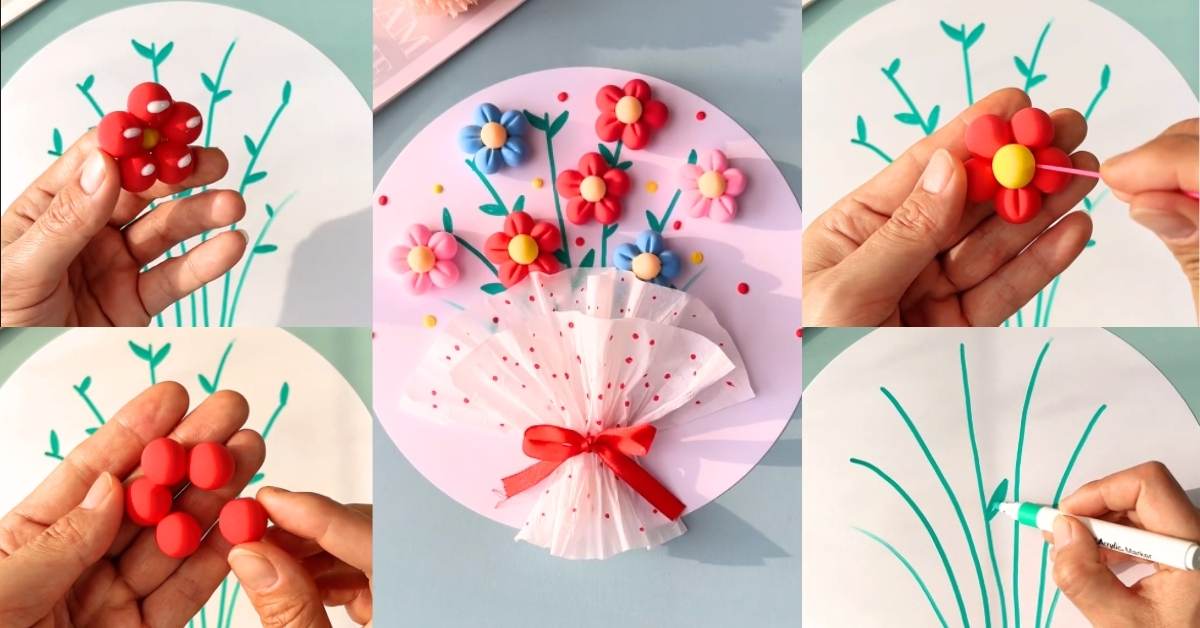
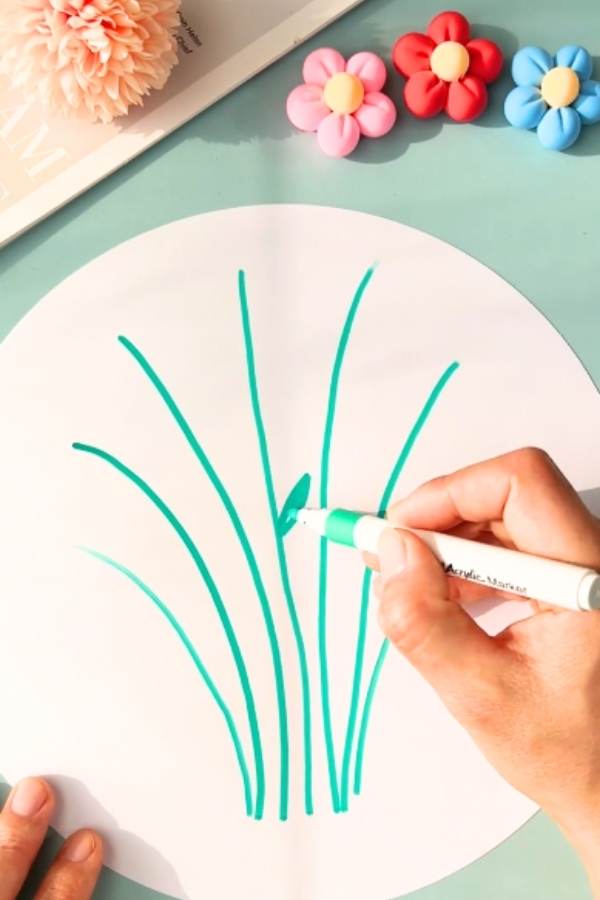
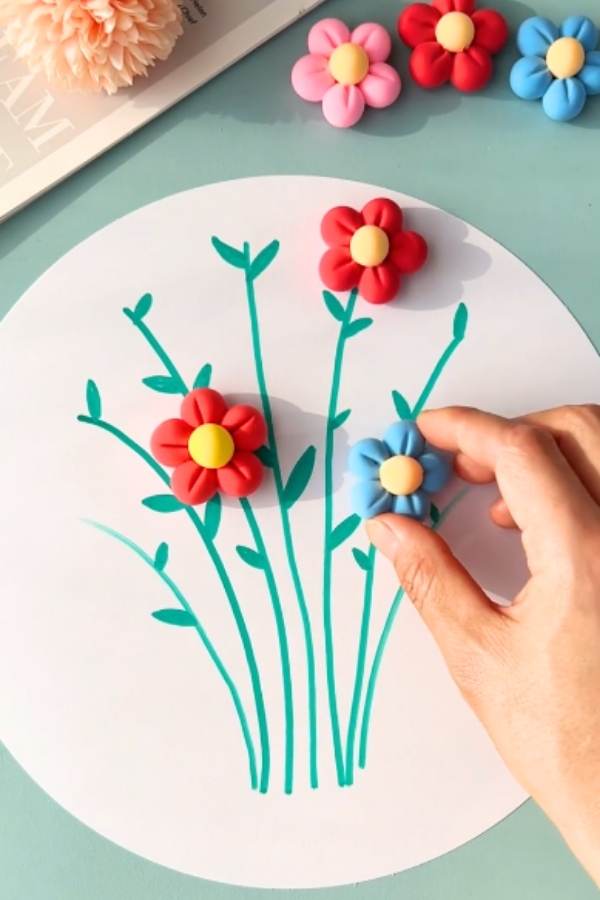
1. Draw the Flower Stems:
Use the green marker to draw one or more stems on the white construction paper. Add little leaves to each stem for a realistic touch.
2. Create the Flower Petals:
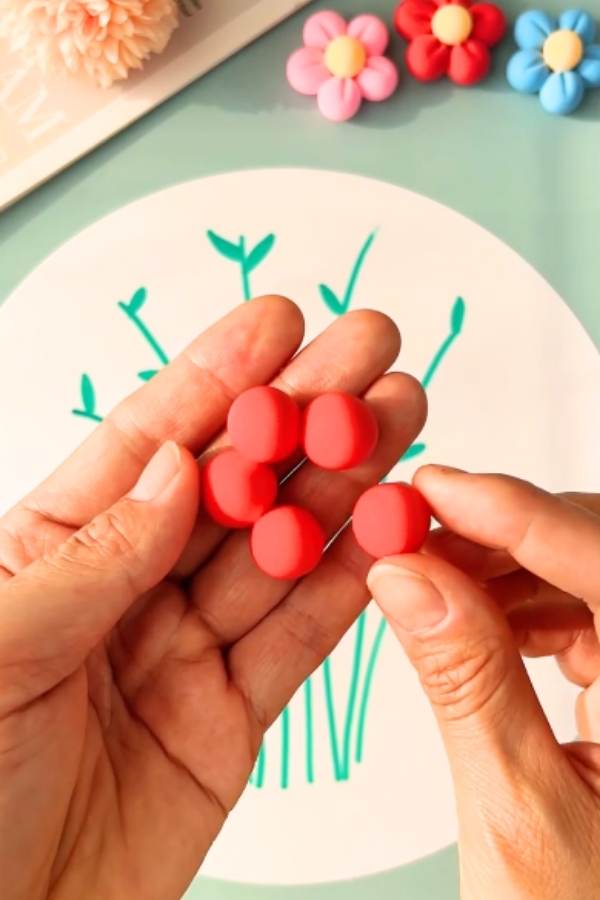
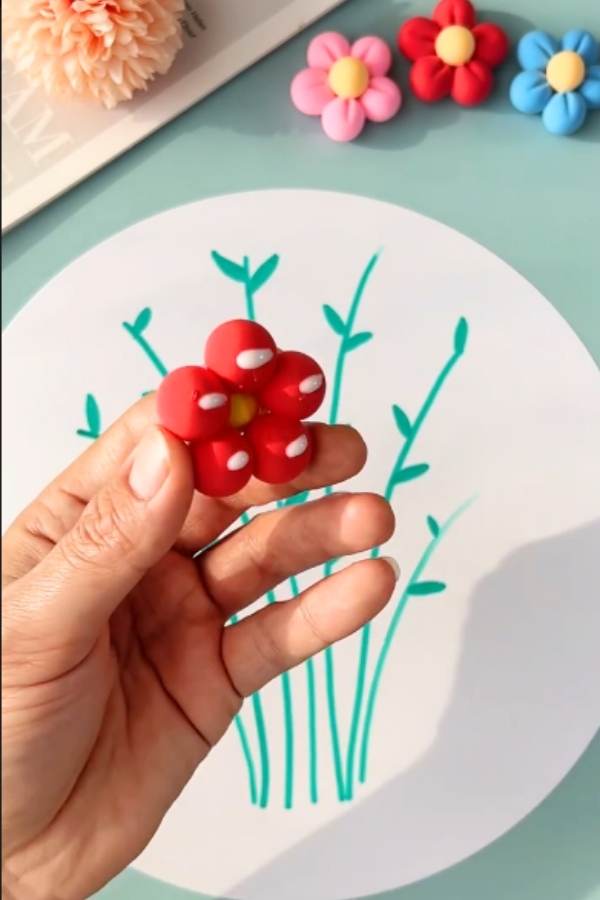
Roll five small balls of red Play-Doh for each flower. These will be the petals.
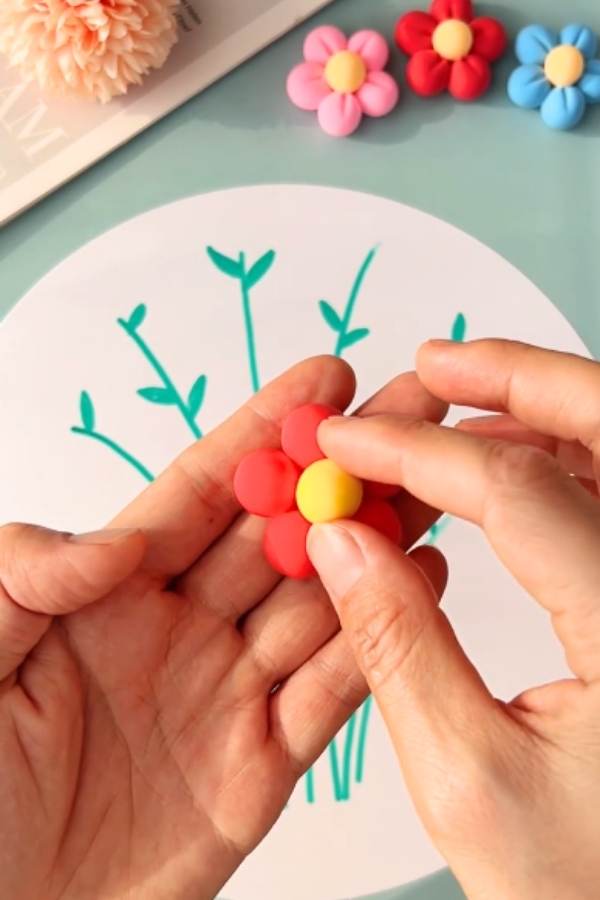
3. Make the Flower Center:
Roll a slightly larger ball of yellow Play-Doh for the center of the flower.
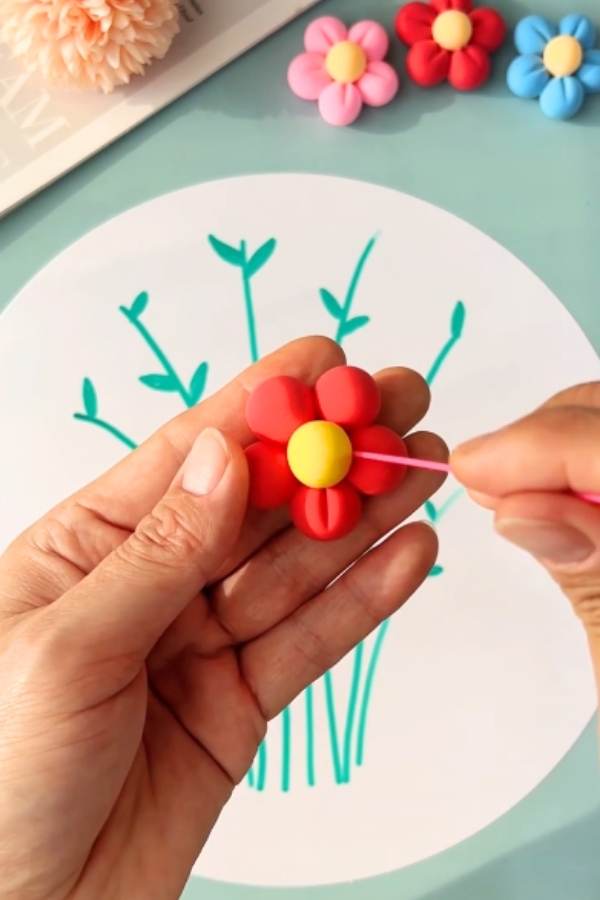
4. Shape the Petals:
Use a plastic butter knife or Play-Doh tool to gently press lines into each red petal, giving them a textured look.
5. Assemble the Flower:
Apply glue to each red petal and arrange them at the top of the stem in a circular pattern.
6. Decorate with Tissue Paper:
Use the red marker to draw small dots all over a piece of tissue paper.
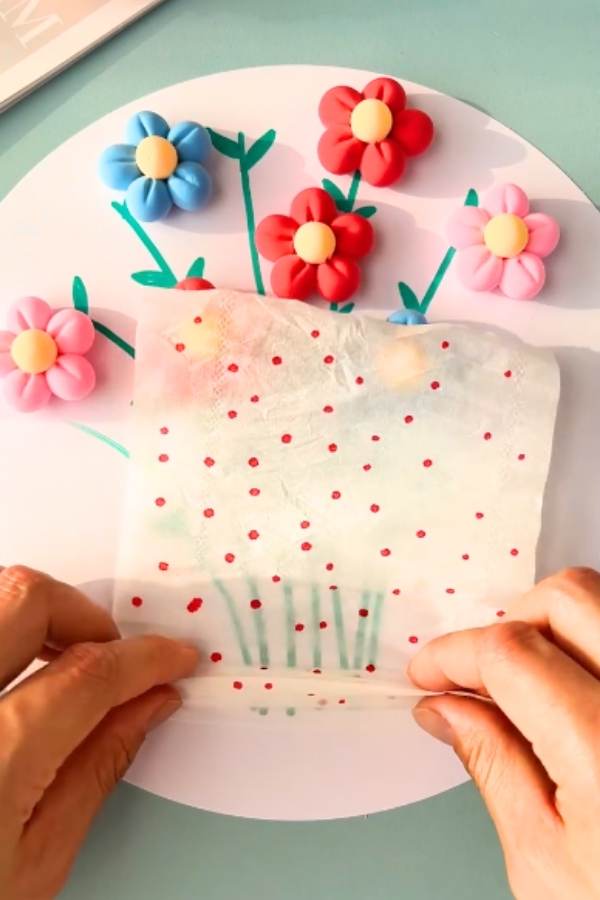
Scrunch the tissue into an accordion shape. Repeat with a second piece for added texture.

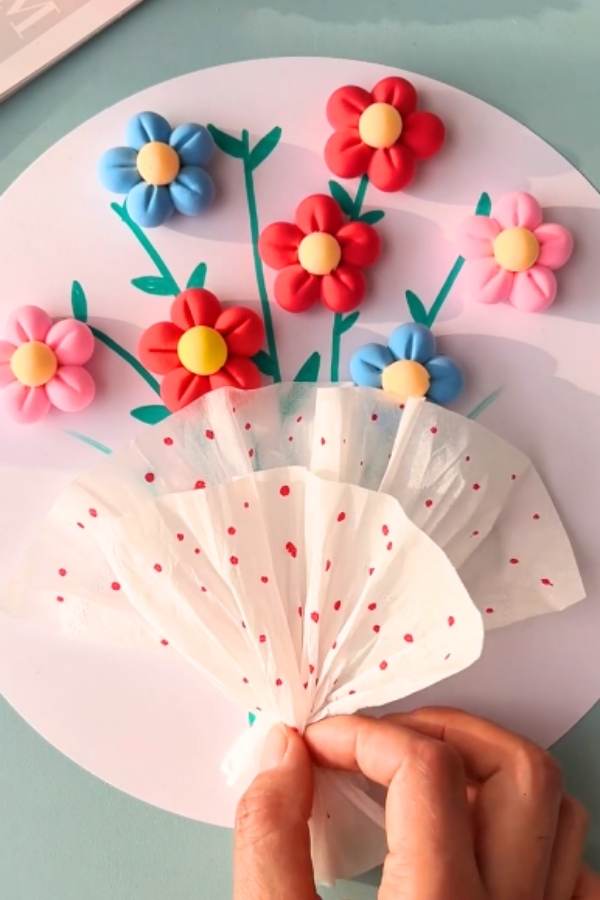
7. Add the Finishing Touch:
Glue the scrunched tissue paper near the bottom of the stems to create extra decoration. Tie a small ribbon into a bow and glue it at the base of the stems for a cute finish!
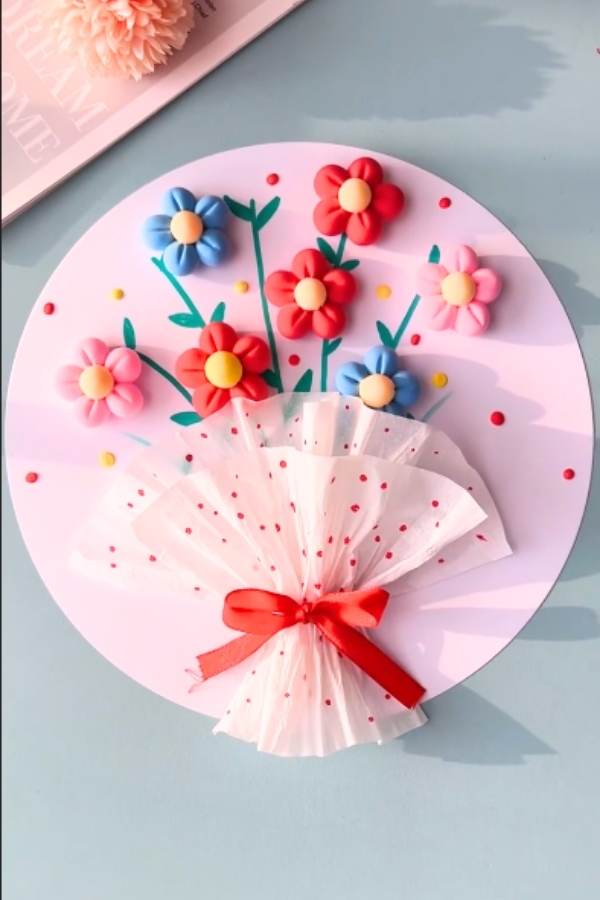
Have fun making your blooming masterpiece!