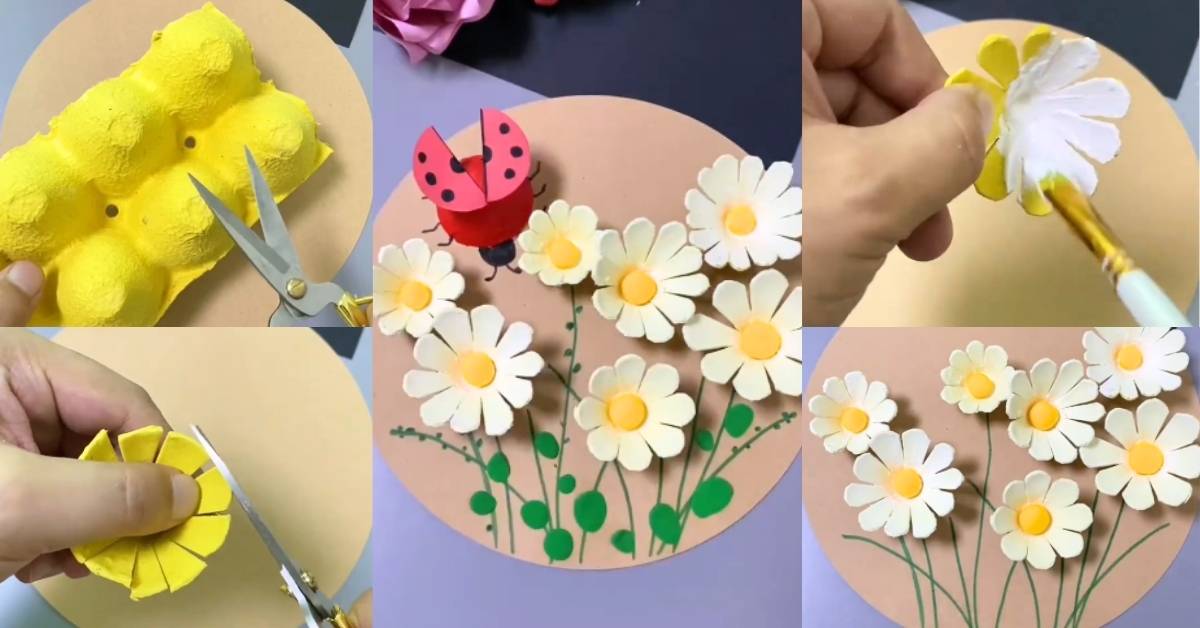
Egg Carton Flower Garden with Ladybugs
Welcome to a fun and creative craft tutorial!
Today, we’re going to turn an old egg carton into beautiful flowers and ladybugs, perfect for a vibrant garden scene.
This project is easy, colorful, and perfect for kids of all ages!
Materials Needed:
- Egg carton
- Scissors
- Paintbrush
- Yellow Play-Doh
- Glue
- Circle piece of paper (preferably white)
- Green marker
- Red paper
- Black marker (for drawing dots and details)
Step-by-Step Instructions:
1. Prepare the Egg Carton:
- Start by cutting an egg carton in half. You’ll use the individual egg “holes” to create your flowers and ladybugs.
- Note: You don’t need to have a yellow egg carton. We’ll be painting the “daisies” white anyway, so a regular carton is fine.

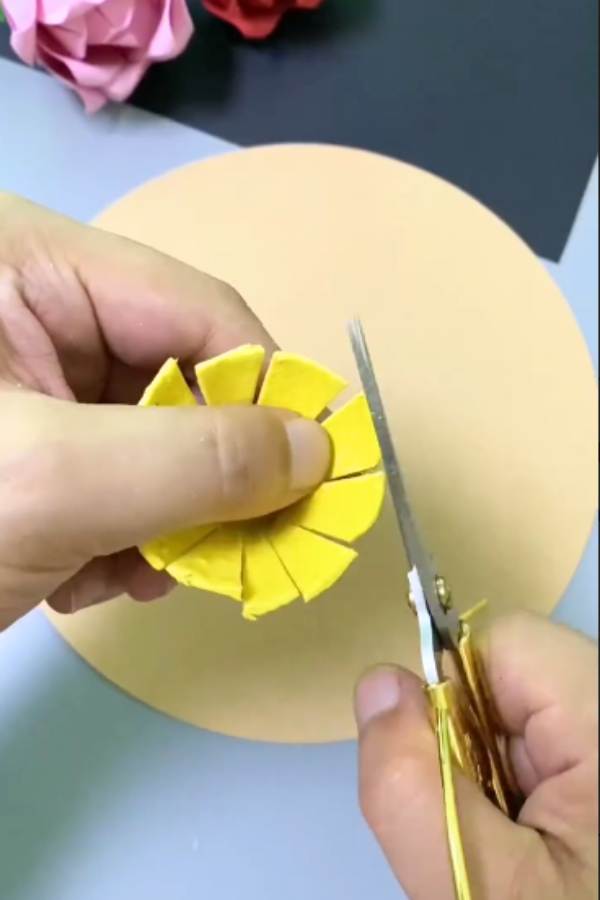
2. Create the Flowers:
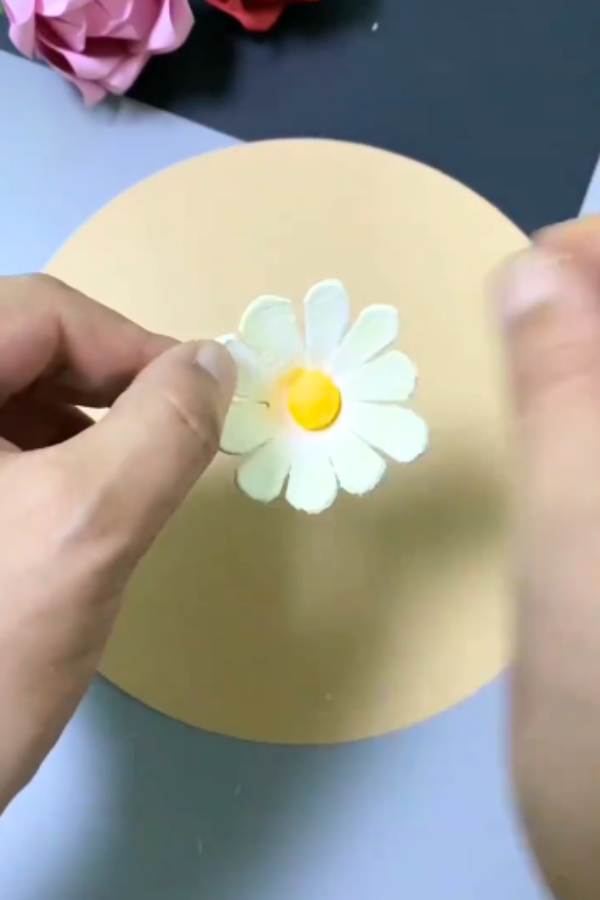
- Cut out each individual egg “hole” from the carton. These will become the petals of your flowers.
- Cut slits all around the edge of the “egg hole” to create flower petals.
- If you want softer, rounder edges for the petals, use your scissors to trim them.
3. Paint the Flowers:
- Take your paintbrush and paint the flower petals however you’d like! You can use bright colors or even add a fun design to each flower.
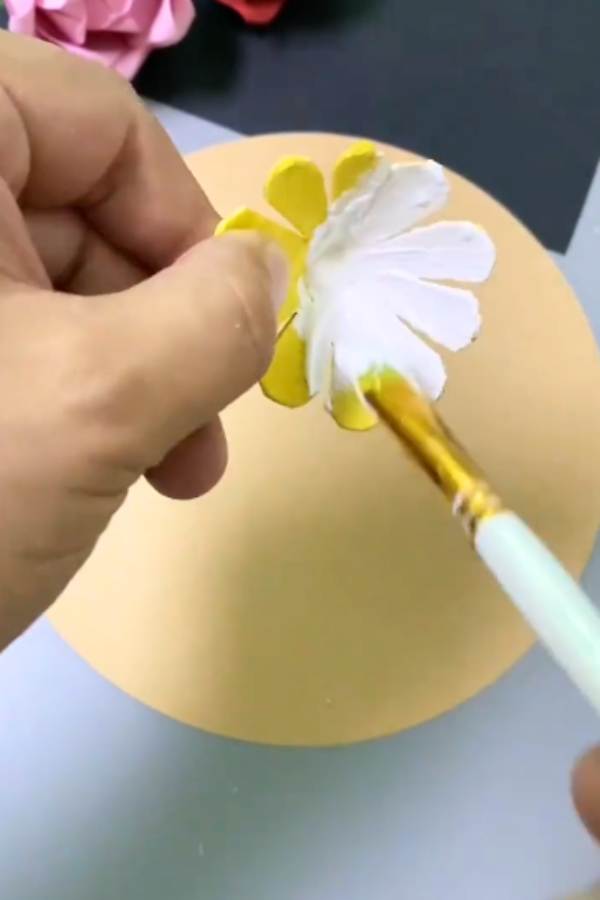
4. Add the Flower Center:
- Take a small piece of yellow Play-Doh and gently press it into the center of the flower. This will make a cute and colorful flower center. Alternatively, you can simply color it with a marker.
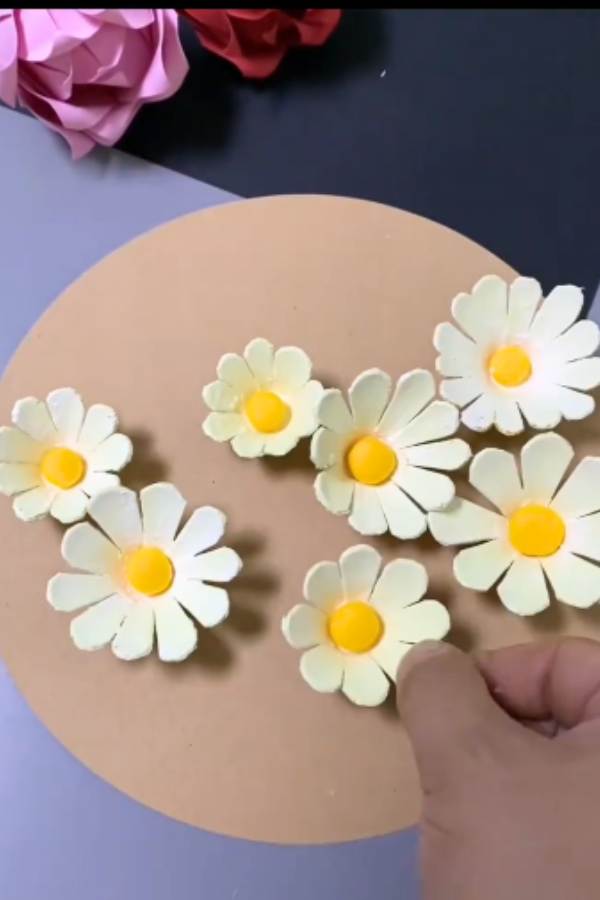
5. Assemble the Flowers:
- Once your flowers are all painted and the Play-Doh is in place, add a small drop of glue to the bottom of each flower.
- Press each flower onto a circle piece of paper where you’d like to place it.
- Repeat this step for as many flowers as you’d like to create your garden!
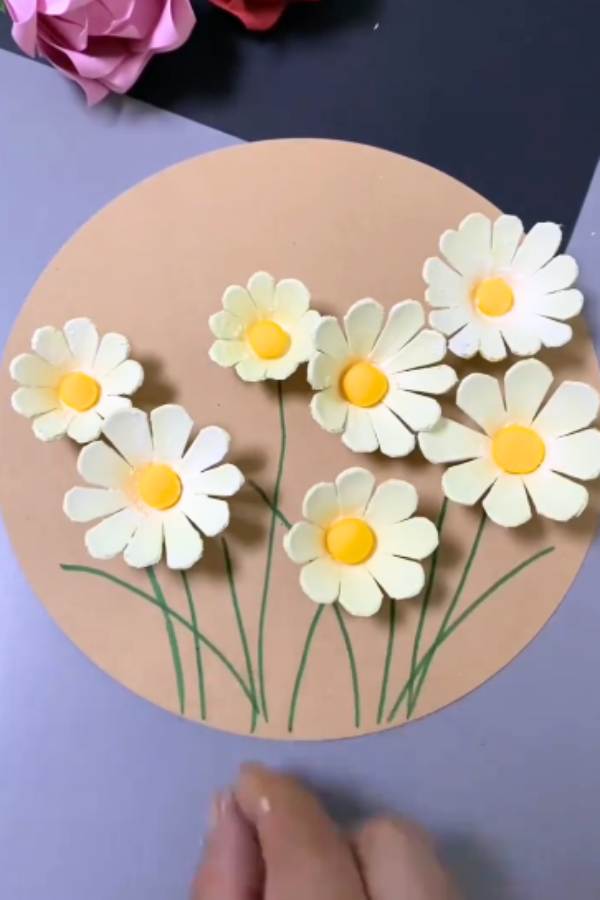
6. Draw the Stems:
- Use a green marker to draw lines coming from the flowers to create the stems. Connect all the stems at the bottom of the paper to make it look like a garden full of blooming flowers!
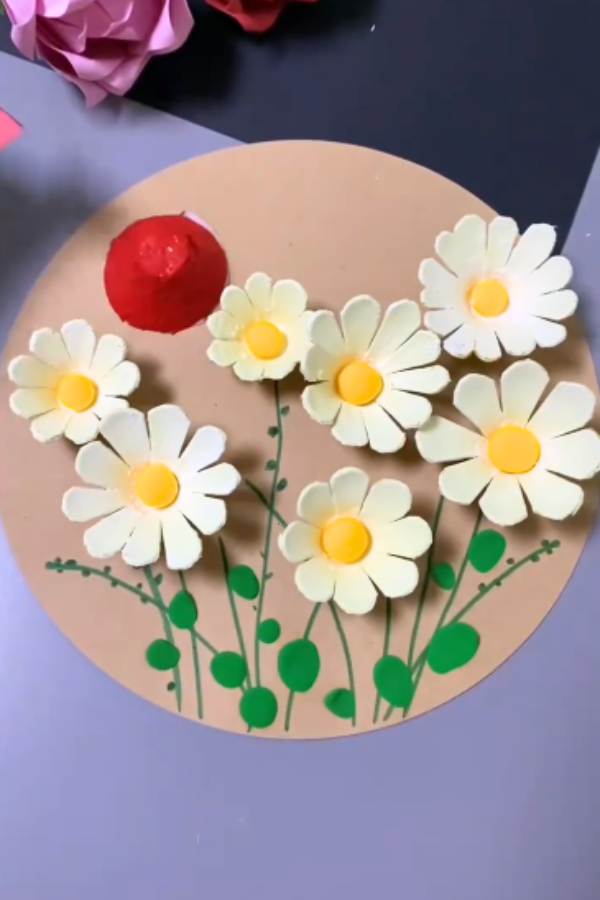
7. Make the Ladybugs:
- Take another egg carton and cut out a section. Paint this part red (or color with a red marker).
- Glue the red painted egg “hole” onto the paper, placing it near your flowers.
- Cut a small circle of red paper and draw little black dots on it (these will be the ladybug spots).
- Glue the circle onto the red egg “hole” to form the ladybug’s back.
8. Create the Ladybug’s Wings:
- Cut the red egg “hole” in half to create the ladybug’s wings.
- Glue the bottom of the wings onto the red egg “hole” so they are attached.
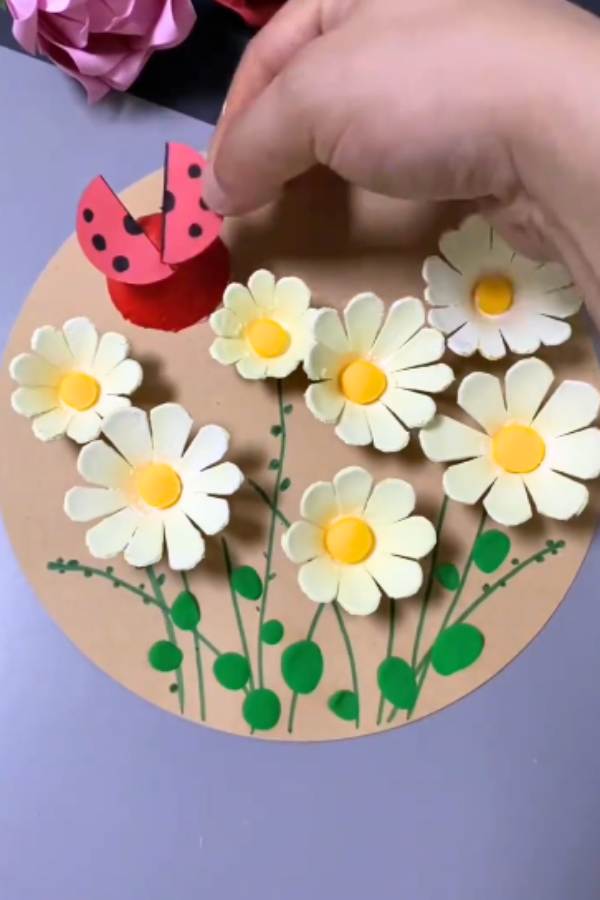
9. Add the Ladybug’s Features:
- Use your black marker to draw six tiny legs, a head, and two antennas on your ladybug to complete it!
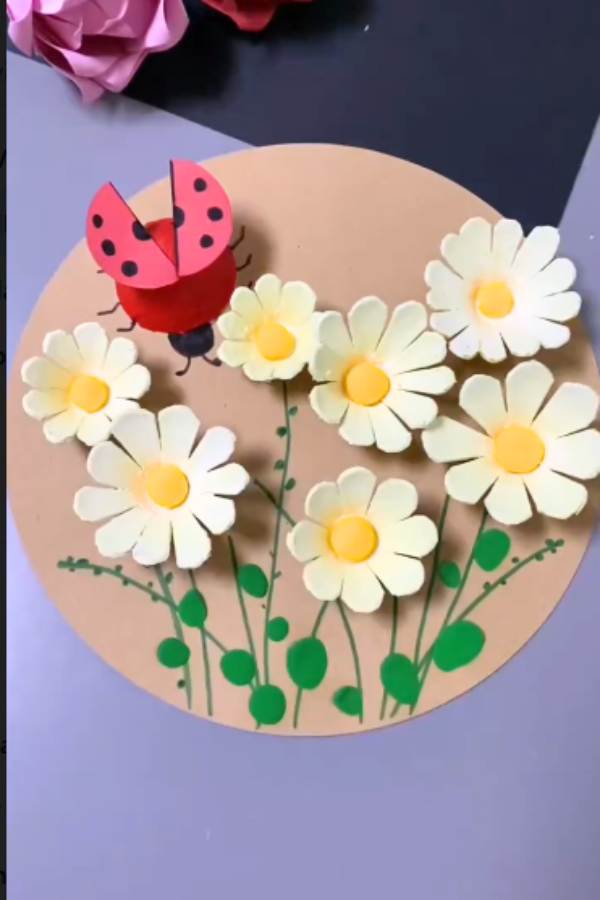
Now you have a beautiful garden full of colorful flowers, complete with a cute ladybug sitting on the paper!
You can add more flowers or ladybugs to make your garden even bigger. Have fun with it!